【 tulaoshi.com - Illustrator 】
在学习中遇到问题可以到 论坛Illustrator版块 发贴交流!
本例为Illustrator字体特效实例教程,主要介绍运用Illustrator CS2制作针脚缝制字体效果的方法,在教程中我们将学习路径、虚线描边、混合模式、应用效果等功能的运用~~
软件:Illustrator CS2
用时:20 min
难度:一般
字体:Akzidenz-Grotesk(其他粗体皆可)
效果完成后,可以新建为图层样式,应用于其他图形。
最终效果:

1、首先使用 Illustrator 新建文本(图 01)。

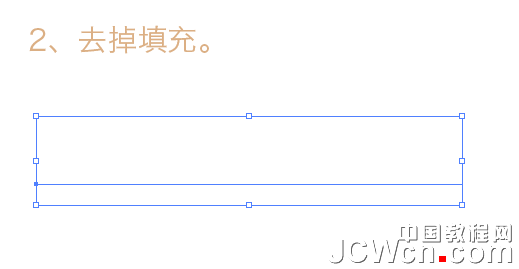
2、去掉填充(图 02)。
3、新建填充(图 03)。

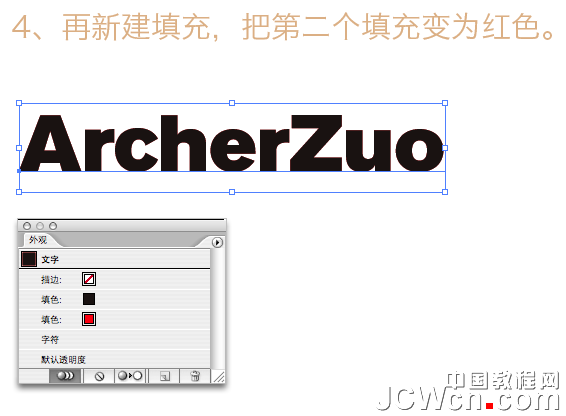
4、再新建填充,把第二个填充为红色(图 04)。
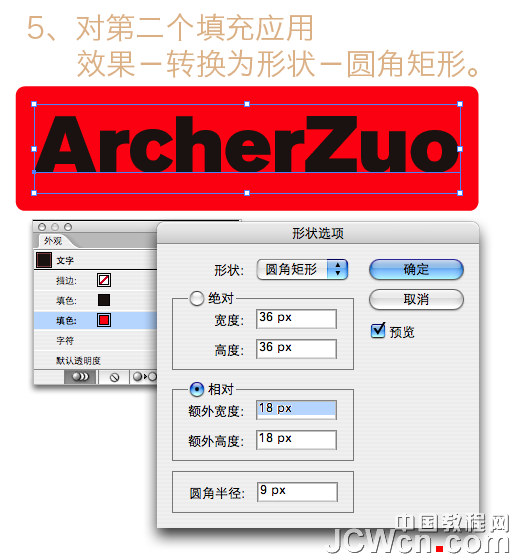
5、对第二个填充应用,效果转换为形状圆角矩形(图 05)。
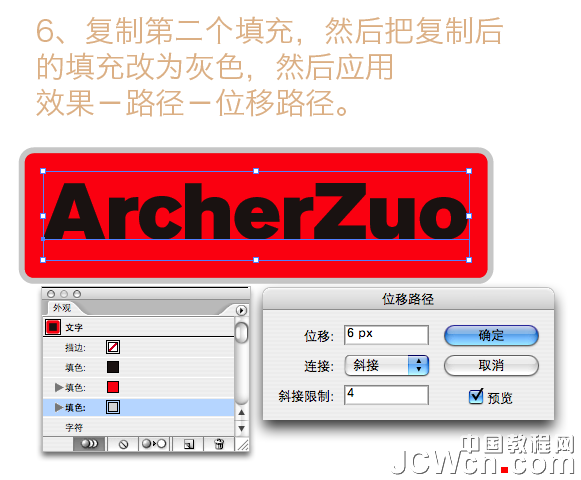
6、复制第二个填充,然后把复制后的填充改为灰色,然后应用效果-路径-位移路径(图 06)。
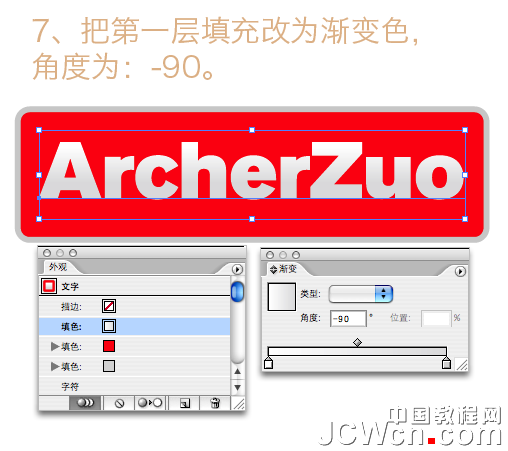
7、把第一层填充改为渐变色,角度为:-90(图 07)。
8、使用 Illustrator 新建 1pt 灰色虚线描边,然后对描边应用“效果路径位移路径”(图 08)。

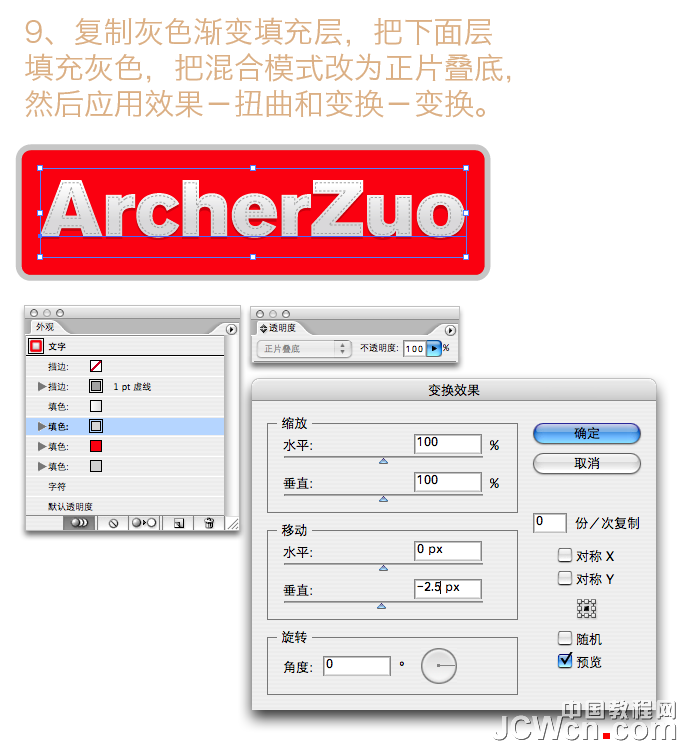
9、复制灰色渐变填充层,把下面层填充灰色,把混合模式改为正片叠底,然后应用效果-扭曲和变换变换(图 09)。
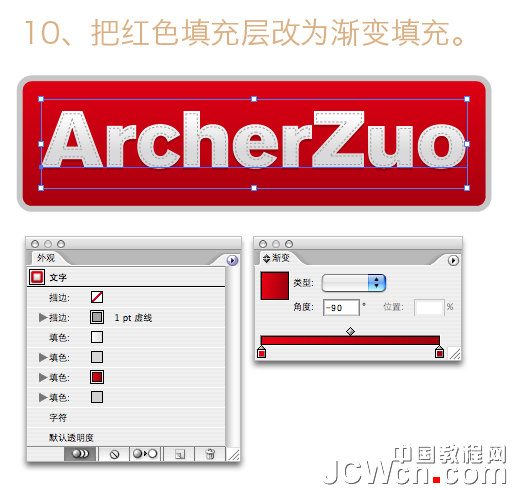
10、把红色填充层改为渐变填充(图 10)。
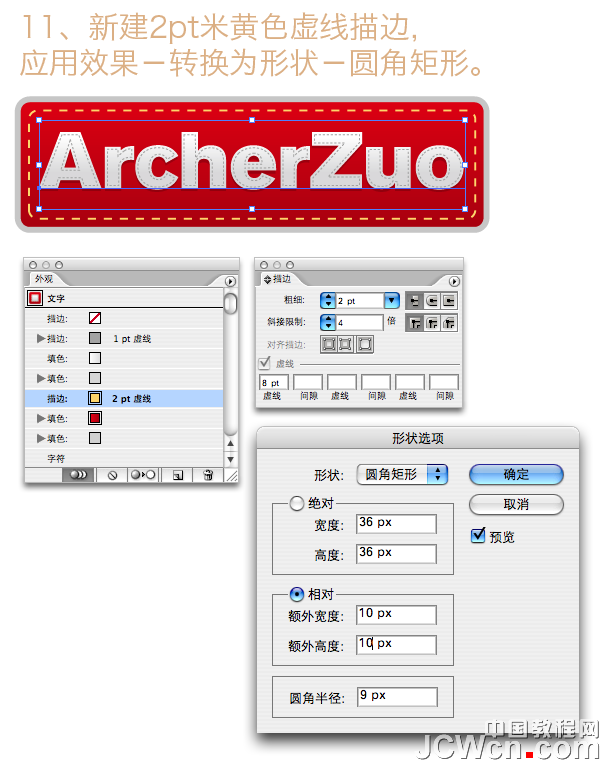
11、在 AI 中新建 2pt 米黄色虚线描边,应用效果-转换为“形状圆角矩形”(图 11)。
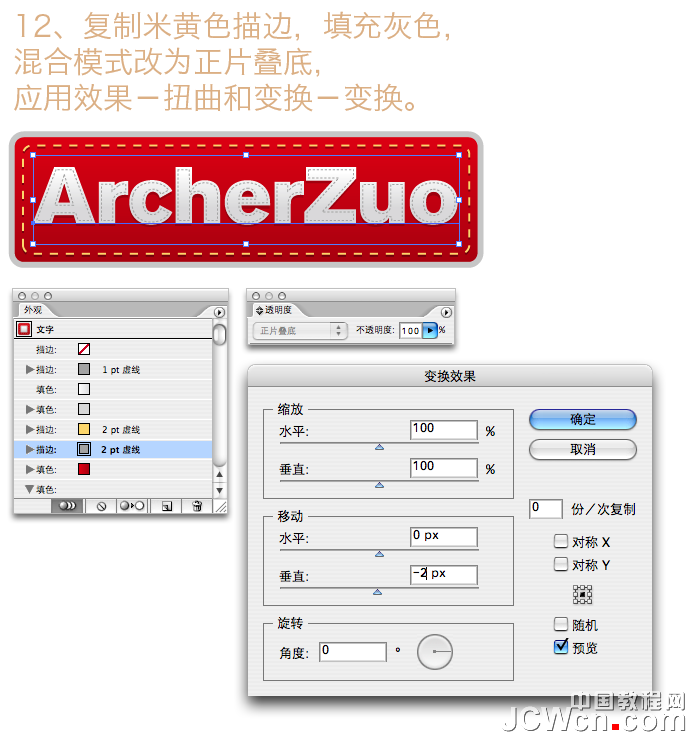
12、复制米黄色描边,填充灰色,混合模式改为正片叠底,应用效果-扭曲和变换变换(图 12)。
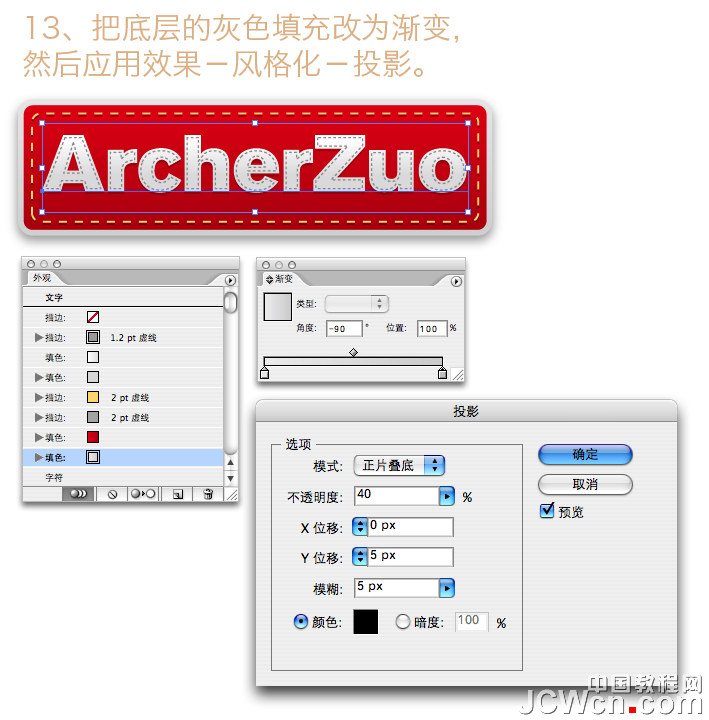
13、把底层的灰色填充改为渐变 ,按后应用“效果风格化投影”(图 13)。
下面是效果图欣赏:


对本文感兴趣的朋友可以到这里参与交流:http://bbs.jcwcn.com/thread-325163-1-1.html