【 tulaoshi.com - PS 】
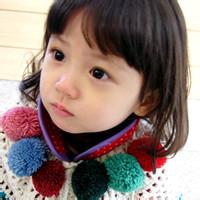
原图

最终效果图

(本文来源于图老师网站,更多请访问http://www.tulaoshi.com/ps/)1、我们先在photoshop中打开照片,然后将它转为灰度模式。单击“图像/模式/灰度”。图1

2、在单击“灰度”后,会弹出一个对话框,问我们是否要扔掉颜色信息。只要单击“确定”就可以了。在灰度模式下有RGB模式下的编辑信息是不被支持的,而且我们选择扔掉颜色信息,也只是扔掉了一些对照片编辑的信息,不会改变已经编辑过的效果。
图2

3、接下来我们要做的就是赋予照片老旧的色调,不过在开始之前我们要先将色彩模式调回RGB模式,因为在灰度模式下有很多色彩编辑命令是不可用的。单击“图像/模式/RGB颜色”,这样就便于后面的图像处理操作。
图3

(本文来源于图老师网站,更多请访问http://www.tulaoshi.com/ps/)4、我们现在就为照片上一个偏黄的颜色,使它看起来像是经过过时间的洗礼。单击“图像/调整/色相、饱和度”,或者按快捷键“Ctrl+U”。
图4

5、在弹出的对话框中勾选“着色”复选框,设置色相为34,饱和度为42,明度为-12,单击“确定”。此处设置的数值是可变的,根据照片的曝光度不同而不同。
图5

6、在图层面板的右下角单击“新建图层”按钮,新建图层1。然后使用工具面板中的“油漆桶工具”将图层1填充为黑色。
图6
图7


(本文来源于图老师网站,更多请访问http://www.tulaoshi.com/ps/)7、接下来在菜单栏中选择“滤镜/杂色/添加杂色”命令,在弹出的对话框中设置数量为16%,并且选择“高斯分布”以及“单色”选项。
图8

8、然后执行“图像/调整/阈值”设置阈值分布为85%。
图9

9、这一步开始就该添加一些简单的划痕效果了。单击“滤镜/模糊/动感模糊”,设置角度为90度,距离为999。
图10

(本文来源于图老师网站,更多请访问http://www.tulaoshi.com/ps/)10、设置图层1的混合方式为“滤色”,这样就可以让图层1和背景图层完美结合。
图11

11、拖动图层1到新建图层处,图层1副本。
图12
图13


12、在图层1副本上执行添加杂色命令。单击“滤镜/杂色/添加杂色”,设置数量为7%,选择“高斯分布”以及“单色”。
图14

(本文来源于图老师网站,更多请访问http://www.tulaoshi.com/ps/)13、接下来执行“滤镜/艺术效果/海绵”,设置画笔大小为10,清晰度为3,平滑度为5。
图15

14、执行“滤镜/杂色/添加杂色”命令,在弹出的对话框中设置数量为8%,并且选择“高斯分布”以及“单色”选项。
图16

15、单击“图层/新调整图层/曲线”,选择“确定”。
图17
图18


(本文来源于图老师网站,更多请访问http://www.tulaoshi.com/ps/)16、调整曲线,设置输入为88,输出为21。
图19

17、单击背景图层,选择“矩形选框工具”,在背景图层上选择中一些地方,并且复制,然后粘贴到图层2中。
图20

18、接下来选中图层2,单击“滤镜/纹理/颗粒”。设置强度为70,对比度为50,颗粒类型为“垂直”,单击确定。
图21

(本文来源于图老师网站,更多请访问http://www.tulaoshi.com/ps/)19、然后使用“橡皮”工具设置画笔为160像素,不透明度为100%,在图层2种擦掉一些不必要的部分。
图22
图23


(本文来源于图老师网站,更多请访问http://www.tulaoshi.com/ps/) 20、设置图层2的混合模式为“正片叠底”。
图24

(本文来源于图老师网站,更多请访问http://www.tulaoshi.com/ps/)21、到这里老照片(图老师整理)效果就基本完成了,不过我们还要进一步的来完善它。选中图层1,使用“橡皮”工具,将那些发亮的线条擦去一些,使画面显得更加自然。将“橡皮”工具的不透明度设为40%,流量设为70%。
图25

22、最后使用“模糊”工具,设置画笔为160,在图层1和图层2中进行一些调整,使画面更加完美。
图26

最终效果图