今天图老师小编给大家介绍下PS鼠绘盾牌图标,平时喜欢PS鼠绘盾牌图标的朋友赶紧收藏起来吧!记得点赞哦~
【 tulaoshi.com - ps鼠绘 】
先看最终效果:

教程开始:
Lets get started create a new document 496 x 496 pixels. Use your prefered background color, ive choses a nice light blue gradient background.
新建一个尺寸为496 x 496的文件。你可以用你喜欢的背景颜色。推荐使用浅蓝色的渐变。如图:
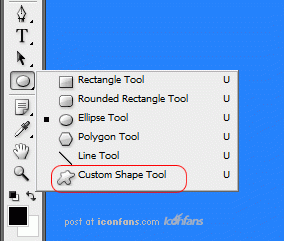
Select the custom shapes tool from the sidebar menu.
选择工具栏上的"自定义形状工具"
Select the sheild shape from the custom shapes libary, change to "shape layers" (see image below).
在属性栏上选择"形状图层",然后在"形状"中选择你需要的形状。(如果只有几个形状可以点击右边的小箭头追加全部的形状。你就会看到很多形状)

Using "shape layers" will retain the shapes quality when needed to resizewww.Tulaoshi.com your document at a later stage. Drag your sheild onto your canvas then add these layer styles.
使用"形状图层"将保留形状质量,以便于在后一阶段调整你的图像。然后给你的图像添加混合选项。如图:
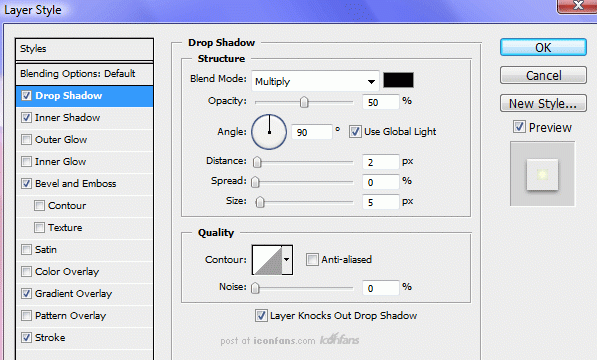

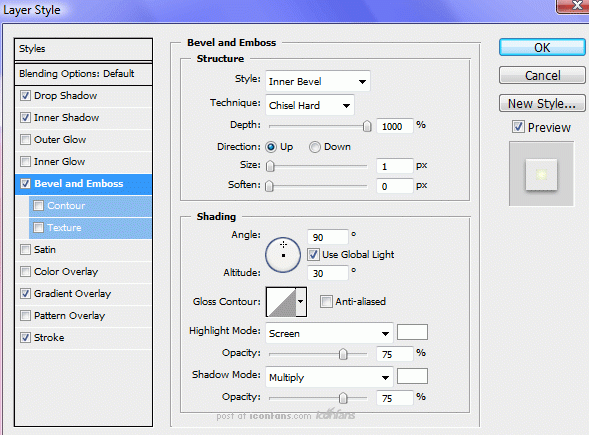


You should have something like this.
你会得到这样的图像效果:

Select the pen tool, change from "shape layers" to "paths", create a path like this.
选择钢笔工具,创建一个像这样的路径:
(本文来源于图老师网站,更多请访问http://www.tulaoshi.com/psshuhuijiaocheng/)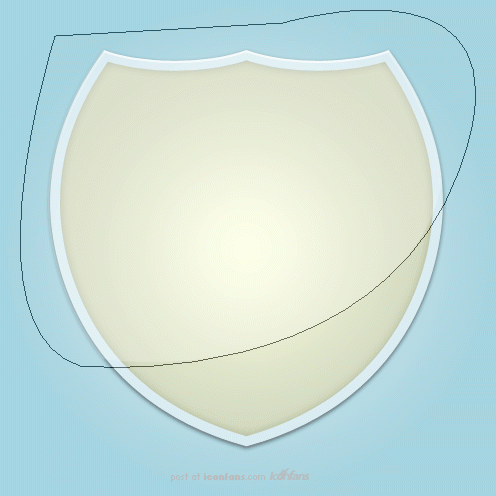
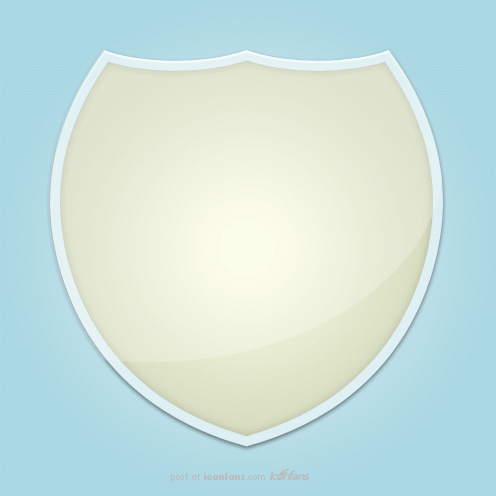
Right click in the middle of your canvas and goto "fill path", make sure you have the color white selected and that you've create a new layer. Select the new layer (so the layer turns blue) then holding the CTRL key on the keyboard click your sheild layer. You should have loaded a selection, now goto "select inverse" then press the delete key on the keyboard. Set the new layers opacity to about 23%, label your layer as "sheild shine".
单击右键填充路径,确保你填充的是白色。你会得到一个新图层。按住CTRL点击盾牌形状图层获得选区。然后反选,选择白色层删除多余的白色。然后把白色图层的透明度调整为23%。图层属性"滤色".如图:
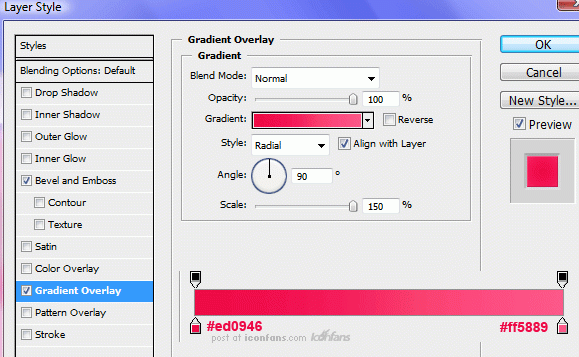
Head back into the custom shapes libary and select the heart shape, draw out your heart shape in the middle of you sheild, fill with any (图老师整理)color then add these layer styles.
返回到自定义形状库,并选择心形状,调整好大小把心形图层放在中间,填充你喜欢的颜色然后添加混合选项:

You should have something like this.
你会得到这样的图像效果:

Using the pen tool once more make two selections (one at a time) like the image below. Use the same method as when we create the shine for the sheild.
使用钢笔工具,再次画出两个选区(一次一个),如下图。之前我们已经使用了相同的方法得到了盾牌上的高光部分。

Fill the selections with the color wtulaoShi.comhite then set layer opacity to 20%.
(本文来源于图老师网站,更多请访问http://www.tulaoshi.com/psshuhuijiaocheng/)填充选区白色,然后设置不透明层至20% 。

Select the type tool and simple add a plus sign to the heart.
用文字工具给心形添加一个加号:

Thats it all done.
OK!完成啦!鼓掌!
来源:http://www.tulaoshi.com/n/20160405/2124450.html