首页 相关文章 Photoshop三步打造完美的人像修图

Photoshop三步打造完美的人像修图

人像摄影表现的主体是人物,照片中人物的表情和姿态在很大程度上决定了图片带给观者的视觉感受。如果通过数码后期给照片中的人物塑形,让人物的面孔更加精致,那么图片效果会更加漂亮。

精致修饰人物应该从皮肤质感,脸型轮廓,五官大小等方面入手,通过改变局部细节,突出人物气质,塑造人物的形体美感。

平时我们所拍摄的客人,基本都不具备模特的条件,而对于后期数码来说,通过精致修饰让人物更加完美则很容易实现。

精致修图基本步骤:

第一步精致修饰脸型和轮廓。

第二步精致皮肤质感与色彩。

第三步精致修饰妆效。

下面我们就以这两张作品为例来介绍这三个基本步骤。
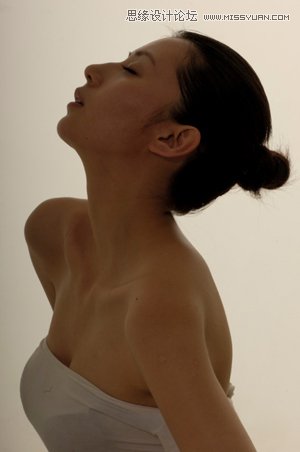
Photoshop三步打造完美的人像修图,PS教程,图老师教程网

图1原图

Photoshop三步打造完美的人像修...<a href="http://www.tulaoshi.com/n/20160216/1567290.html" target="_blank">[ 查看全文 ]</a></p>
            <div class="img_yyy_2">
                <span>2016-02-16</span>
                                                <i>标签:</i>
                <div class="yyy_2_a"><a href="http://www.tulaoshi.com/ps/" target="_blank">PS</a> <a href="http://www.tulaoshi.com/psjichu/" target="_blank">PS基础</a></div>
                                </div>
		</div>
	</div>
</div>

<div class="xiangguan_gg xiangguan_reader clearfix">
    <div class="xiang_892_1" style="width:1158px;">
      <h3><a href="http://www.tulaoshi.com/n/20160216/1567290.html" target="_blank">Photoshop三步打造完美的人像修图</a>的相关文章</h3>
    </div>
    <div class="xiang_892_2" style="width:1158px;">
      <ul id="loadmore_container" style="width:1158px;">
                <li>
          <div class="xiang_892_2_1"><a href="/reader/1524101" target="_blank"><img src="http://img.tulaoshi.com/201601/31/30e7a4b5ea1a4512a142548863aaec3f_thumb_189.jpg" width="224" height="173"></a></div>
          <div class="xiang_right clearfix">
            <div class="xiang_right_1"><A href="http://www.tulaoshi.com/n/20160131/1524101.html" target="_blank">Photoshop给粗糙的人像完美的修片及润色</A></div>
                                    <div class="xiang_righ_lable">标签:<a href="http://www.tulaoshi.com/psxpcl/" target="_blank">PS相片处理</a> <a href="http://www.tulaoshi.com/psjichu/" target="_blank">PS基础</a> <a href="http://www.tulaoshi.com/ps/" target="_blank">PS</a> <a href="http://www.tulaoshi.com/psxg/" target="_blank">PS效果</a></div>
                         <div class="span_em_123"> 作者修片的时候对色彩把握的非常好,整体以黄褐色为主,适当加入了一些绿色,看上去质感突出,层次分明。教程以调色为主,其中磨皮的过程已经略去,处理的时候需要自己手动去磨皮。 原图 最终效果 1、打开原片,创建色彩平衡调整图层,数值:高光0/+13/-8。 2、创建可选颜色调整图层,参数设置如下图。 3、创建照片滤镜调整图层,参数设置如下图。 4...<a href="http://www.tulaoshi.com/n/20160131/1524101.html" target="_blank">[ 查看全文 ]</a></div>
            <div class="span_em ">
              <div class="cai_list_font"><a href="/user/LL13295282146/" target="_blank"><img src="http://static.tulaoshi.com/html/tulaoshi_new/images/touxiang/11.jpg" /><span>LL13295282146</span></a></div>
              <span class="font_span"><a class="em_s" href="javascript:;">39</a><a class="em_s2" href="javascript:;">1</a></span></div>
          </div>
        </li>
                <li>
          <div class="xiang_892_2_1"><a href="/reader/1564384" target="_blank"><img src="http://img.tulaoshi.com/201602/15/7b92320b7cf08ff4d7a016cc324c00c9_thumb_189.jpg" width="224" height="173"></a></div>
          <div class="xiang_right clearfix">
            <div class="xiang_right_1"><A href="http://www.tulaoshi.com/n/20160215/1564384.html" target="_blank">Photoshop通过液化工具打造完美的人像效果</A></div>
                                    <div class="xiang_righ_lable">标签:<a href="http://www.tulaoshi.com/ps/" target="_blank">PS</a> <a href="http://www.tulaoshi.com/psjichu/" target="_blank">PS基础</a></div>
                         <div class="span_em_123"> 人们常常用天使面孔魔鬼身材来形容一个人外貌的完美程度,但在人像照片处理的过程中,并不是每一个人都能达到这种要求,而进入数码时代后,借助软件的特有功能,就能使画面中的人物主体无限接近这一完美形象了,现实生活中的人并不是每一个都那么完美,我们每个人都会有一张个性的面孔,那么要怎样让人像更完美,这是有相应的参照标准的。 首先,完美人物的脸型讲究三庭五眼,所谓三庭,即:面部长度分为三...<a href="http://www.tulaoshi.com/n/20160215/1564384.html" target="_blank">[ 查看全文 ]</a></div>
            <div class="span_em ">
              <div class="cai_list_font"><a href="/user/QQ1225132038/" target="_blank"><img src="http://static.tulaoshi.com/html/tulaoshi_new/images/touxiang/4.jpg" /><span>QQ1225132038</span></a></div>
              <span class="font_span"><a class="em_s" href="javascript:;">14</a><a class="em_s2" href="javascript:;">1</a></span></div>
          </div>
        </li>
                <li>
          <div class="xiang_892_2_1"><a href="/reader/1525555" target="_blank"><img src="http://img.tulaoshi.com/201602/01/ed5609312cdf5bfa86945854dcb2f206_thumb_189.jpg" width="224" height="173"></a></div>
          <div class="xiang_right clearfix">
            <div class="xiang_right_1"><A href="http://www.tulaoshi.com/n/20160201/1525555.html" target="_blank">简单三步打造柔美的暖色照片</A></div>
                                    <div class="xiang_righ_lable">标签:<a href="http://www.tulaoshi.com/psxpcl/" target="_blank">PS相片处理</a> <a href="http://www.tulaoshi.com/psjichu/" target="_blank">PS基础</a> <a href="http://www.tulaoshi.com/ps/" target="_blank">PS</a> <a href="http://www.tulaoshi.com/psxg/" target="_blank">PS效果</a></div>
                         <div class="span_em_123"> 本教程的调色可以说是简单实用。用到的调色工具不多,仅用到色阶和曲线工具,只要自己稍微控制好色调的数据,就可以调出非常漂亮的颜色。 原图 最终效果1 最终效果2 1、打开原图素材。选择菜单:图像 新建调整图层 色阶,对各通道进行调整,参数设置如下图。 2、选择菜单:图像 新建调整图层 曲线,参数设置如下图。 3、新建一个图层,按Ctrl + Alt + Shift + E 盖印图...<a href="http://www.tulaoshi.com/n/20160201/1525555.html" target="_blank">[ 查看全文 ]</a></div>
            <div class="span_em ">
              <div class="cai_list_font"><a href="/user/China传媒12/" target="_blank"><img src="http://static.tulaoshi.com/html/tulaoshi_new/images/touxiang/25.jpg" /><span>China传媒12</span></a></div>
              <span class="font_span"><a class="em_s" href="javascript:;">4</a><a class="em_s2" href="javascript:;">1</a></span></div>
          </div>
        </li>
                <li>
          <div class="xiang_892_2_1"><a href="/reader/129907" target="_blank"><img src="http://img.tulaoshi.com/201501/16/top201501161000585036_thumb_189.jpg" width="224" height="173"></a></div>
          <div class="xiang_right clearfix">
            <div class="xiang_right_1"><A href="http://www.tulaoshi.com/n/20150116/129907.html" target="_blank">低发髻盘发教程 三步打造完美造型</A></div>
                                    <div class="xiang_righ_lable">标签:<a href="http://www.tulaoshi.com/fxsjylxdp/" target="_blank">发型设计与脸型搭配</a> <a href="http://www.tulaoshi.com/pfjc/" target="_blank">盘发教程</a></div>
                         <div class="span_em_123"> 三款盘发发型 同时低发髻盘发,通过刘海设计,搭配不同的发饰让三款低发髻造型各有气质,对着三款造型都很喜欢?马上看看它们的盘发技巧吧。 style 1 侧边低发髻 斜刘海搭配卷发发丝修饰出甜美可爱脸型,优雅的发饰让发髻得到升华,整款造型更好看。 盘发技巧 step 1 :头发全部集中...<a href="http://www.tulaoshi.com/n/20150116/129907.html" target="_blank">[ 查看全文 ]</a></div>
            <div class="span_em ">
              <div class="cai_list_font"><a href="/user/fly /" target="_blank"><img src="http://static.tulaoshi.com/html/tulaoshi_new/images/touxiang/7.jpg" /><span>fly </span></a></div>
              <span class="font_span"><a class="em_s" href="javascript:;">117</a><a class="em_s2" href="javascript:;">1</a></span></div>
          </div>
        </li>
                <li>
          <div class="xiang_892_2_1"><a href="/reader/1523078" target="_blank"><img src="http://img.tulaoshi.com/201601/31/ee828ff2db816f291f6b598a8da77ca5_thumb_189.jpg" width="224" height="173"></a></div>
          <div class="xiang_right clearfix">
            <div class="xiang_right_1"><A href="http://www.tulaoshi.com/n/20160131/1523078.html" target="_blank">Photoshop打造完美的冬日彩妆人像</A></div>
                                    <div class="xiang_righ_lable">标签:<a href="http://www.tulaoshi.com/psxpcl/" target="_blank">PS相片处理</a> <a href="http://www.tulaoshi.com/psjichu/" target="_blank">PS基础</a> <a href="http://www.tulaoshi.com/ps/" target="_blank">PS</a> <a href="http://www.tulaoshi.com/psxg/" target="_blank">PS效果</a></div>
                         <div class="span_em_123"> 冬日人物处理还是有很多技巧的。首先选择的整体色调要比较冷,包括人物的彩妆也用冷调。用到的装饰元素也要是冬季独有的。其它细节的处理跟其它人像处理基本类似。 原图 最终效果 1、打开素材图片,用套索工具把人物脸部区域选取出来,如下图。 2、按Ctrl + J 把选区部分的图像复制到新的图层,如下图。 3、执行:滤镜 模糊 表面模糊,数值为8。 4、按Ctrl + ...<a href="http://www.tulaoshi.com/n/20160131/1523078.html" target="_blank">[ 查看全文 ]</a></div>
            <div class="span_em ">
              <div class="cai_list_font"><a href="/user/揪下来/" target="_blank"><img src="http://static.tulaoshi.com/html/tulaoshi_new/images/touxiang/8.jpg" /><span>揪下来</span></a></div>
              <span class="font_span"><a class="em_s" href="javascript:;">53</a><a class="em_s2" href="javascript:;">1</a></span></div>
          </div>
        </li>
                <li>
          <div class="xiang_892_2_1"><a href="/reader/216317" target="_blank"><img src="http://img.tulaoshi.com/201507/02/b9f43baa04267200e595c1e25494da6a_thumb_189.jpg" width="224" height="173"></a></div>
          <div class="xiang_right clearfix">
            <div class="xiang_right_1"><A href="http://www.tulaoshi.com/n/20150702/216317.html" target="_blank">三步骤打造完美底妆效果</A></div>
                                    <div class="xiang_righ_lable">标签:<a href="http://www.tulaoshi.com/huazhuang/" target="_blank">化妆</a></div>
                         <div class="span_em_123"> 底妆的好坏,直接关系着彩妆的成败。让我们一起看看如何才能打造完美的底妆效果吧。 1、粉底不可缺 粉底能让脸部肌肤显得轻柔自然。在涂抹粉底液时,要迅速地向外大面积抹开,以免粉底液干掉后,产生不均匀的色块。 2、妙用饰底乳修正肤色 脸上肤色不均,一定要在底妆时完全修正,这样肤色才更均匀。可根据不同肤质状况,选取不同颜色饰底乳以矫正肤色。涂抹时宜采用指腹按...<a href="http://www.tulaoshi.com/n/20150702/216317.html" target="_blank">[ 查看全文 ]</a></div>
            <div class="span_em ">
              <div class="cai_list_font"><a href="/user/wangweihua1212/" target="_blank"><img src="http://static.tulaoshi.com/html/tulaoshi_new/images/touxiang/17.jpg" /><span>wangweihua1212</span></a></div>
              <span class="font_span"><a class="em_s" href="javascript:;">89</a><a class="em_s2" href="javascript:;">1</a></span></div>
          </div>
        </li>
                <li>
          <div class="xiang_892_2_1"><a href="/reader/1564966" target="_blank"><img src="http://img.tulaoshi.com/201602/15/f444ce9218d491e254f1c9d4118f4f42_thumb_189.jpg" width="224" height="173"></a></div>
          <div class="xiang_right clearfix">
            <div class="xiang_right_1"><A href="http://www.tulaoshi.com/n/20160215/1564966.html" target="_blank">Photoshop详细解析人像后期完美润色修图</A></div>
                                    <div class="xiang_righ_lable">标签:<a href="http://www.tulaoshi.com/ps/" target="_blank">PS</a> <a href="http://www.tulaoshi.com/psjichu/" target="_blank">PS基础</a></div>
                         <div class="span_em_123"> 在本PS教程中,笔者将会通过一些调整图层、笔刷、蒙版等很基础的PS工具来完成对人像的润色。本PS教程的难度不大,但技巧基础性强,对于PS初学者来说非常实用。一起来学习吧。 教程里面需要的素材可以来这里下载:http://www.daimg.com/photo/people/ 最终效果图: 图01 第一步:首先当然是准备好素材。这里要说明的是,选择素材是有一定要求的,那就是质量必须高,要非常清晰,甚至毛孔都必须清晰可见...<a href="http://www.tulaoshi.com/n/20160215/1564966.html" target="_blank">[ 查看全文 ]</a></div>
            <div class="span_em ">
              <div class="cai_list_font"><a href="/user/镐木/" target="_blank"><img src="http://static.tulaoshi.com/html/tulaoshi_new/images/touxiang/16.jpg" /><span>镐木</span></a></div>
              <span class="font_span"><a class="em_s" href="javascript:;">2</a><a class="em_s2" href="javascript:;">1</a></span></div>
          </div>
        </li>
                <li>
          <div class="xiang_892_2_1"><a href="/reader/1525295" target="_blank"><img src="http://img.tulaoshi.com/201602/01/15c47e3817e6d1bd85337049f42c58df_thumb_189.jpg" width="224" height="173"></a></div>
          <div class="xiang_right clearfix">
            <div class="xiang_right_1"><A href="http://www.tulaoshi.com/n/20160201/1525295.html" target="_blank">三步打造绚丽的碎块剪影人像</A></div>
                                    <div class="span_em_123"> 教程重点介绍一下碎片人像的制作思路。如果是真实人像图片,还需要经过简单的处理,把暗部转为矢量图,然后再上色及添加碎片等。 最终效果 1、打开人物剪影素材,用魔棒工具把人物选取出来,复制到新的图层。 2、新建一个图层,用画笔随手涂些颜色,看个人喜好 ctrl+左键点人物图层,弄出选区,反选去掉不要的。 3、碎屑同上的方法复制出来,然后用套索工具选取局部复制,贴...<a href="http://www.tulaoshi.com/n/20160201/1525295.html" target="_blank">[ 查看全文 ]</a></div>
            <div class="span_em ">
              <div class="cai_list_font"><a href="/user/游客泰特/" target="_blank"><img src="http://static.tulaoshi.com/html/tulaoshi_new/images/touxiang/5.jpg" /><span>游客泰特</span></a></div>
              <span class="font_span"><a class="em_s" href="javascript:;">36</a><a class="em_s2" href="javascript:;">1</a></span></div>
          </div>
        </li>
                <li>
          <div class="xiang_892_2_1"><a href="/reader/1549" target="_blank"><img src="http://img.tulaoshi.com/201207/20/user201207202242266397.jpg" width="224" height="173"></a></div>
          <div class="xiang_right clearfix">
            <div class="xiang_right_1"><A href="http://www.tulaoshi.com/n/20120720/1549.html" target="_blank">PS照片处理 为粗糙的人像完美的修片教程</A></div>
                                    <div class="xiang_righ_lable">标签:<a href="http://www.tulaoshi.com/psjiaocheng/" target="_blank">PS教程</a></div>
                         <div class="span_em_123">  原图    一:按ctrl+o打开原图。按ctrl+b挑战色彩平衡,输入(0、+13、-8)。   二:选择菜单栏—图像—调整—可选颜色,分别对红黄绿进行参数设置。    三:选择菜单栏—图像—调整—照片滤镜,对照片滤镜选择青色浓度改为16%。 ...<a href="http://www.tulaoshi.com/n/20120720/1549.html" target="_blank">[ 查看全文 ]</a></div>
            <div class="span_em ">
              <div class="cai_list_font"><a href="/user/ 胡娟/" target="_blank"><img src="http://static.tulaoshi.com/html/tulaoshi_new/images/touxiang/19.jpg" /><span> 胡娟</span></a></div>
              <span class="font_span"><a class="em_s" href="javascript:;">220</a><a class="em_s2" href="javascript:;">1</a></span></div>
          </div>
        </li>
                <li>
          <div class="xiang_892_2_1"><a href="/reader/1522478" target="_blank"><img src="http://img.tulaoshi.com/201601/30/984f2ac9088aeba23bf31ab669505e49_thumb_189.jpg" width="224" height="173"></a></div>
          <div class="xiang_right clearfix">
            <div class="xiang_right_1"><A href="http://www.tulaoshi.com/n/20160130/1522478.html" target="_blank">Photoshop打造完美的冬季冷色彩妆人像</A></div>
                                    <div class="xiang_righ_lable">标签:<a href="http://www.tulaoshi.com/psxpcl/" target="_blank">PS相片处理</a> <a href="http://www.tulaoshi.com/psjichu/" target="_blank">PS基础</a> <a href="http://www.tulaoshi.com/ps/" target="_blank">PS</a> <a href="http://www.tulaoshi.com/psxg/" target="_blank">PS效果</a></div>
                         <div class="span_em_123"> 作者在美化人像的时候非常细心,同时基础也非常扎实,基本上每一个细节都处理得非常到位,如肤色质感、整体明暗、背景及装饰等。 原图 最终效果 1、修饰皮肤,(真实而细腻)如果还有朋友不会修饰皮肤的话,请到网上搜相关的教程,因为,今天我不聊基础 我们聊的是基本修调皮肤之后的事情。 2、女子脸上局部出现很多明暗过渡不均肌理结构!那么我需要结合肌理与光向、光质、去修调、...<a href="http://www.tulaoshi.com/n/20160130/1522478.html" target="_blank">[ 查看全文 ]</a></div>
            <div class="span_em ">
              <div class="cai_list_font"><a href="/user/毒品雪/" target="_blank"><img src="http://static.tulaoshi.com/html/tulaoshi_new/images/touxiang/8.jpg" /><span>毒品雪</span></a></div>
              <span class="font_span"><a class="em_s" href="javascript:;">24</a><a class="em_s2" href="javascript:;">1</a></span></div>
          </div>
        </li>
                <li>
          <div class="xiang_892_2_1"><a href="/reader/1517753" target="_blank"><img src="http://img.tulaoshi.com/201601/30/fd2c84ae27dcbc07dae94473bf5dd4df_thumb_189.jpg" width="224" height="173"></a></div>
          <div class="xiang_right clearfix">
            <div class="xiang_right_1"><A href="http://www.tulaoshi.com/n/20160130/1517753.html" target="_blank">三步打造漂亮签名</A></div>
                                    <div class="xiang_righ_lable">标签:<a href="http://www.tulaoshi.com/ps/" target="_blank">PS</a> <a href="http://www.tulaoshi.com/psjiaocheng/" target="_blank">PS教程</a></div>
                         <div class="span_em_123">大家可以跟着步骤来做做看, screen.width*0.7) {this.resized=true; this.width=screen.width*0.7; this.alt=  screen.width*0.7) {this.resized=true; this.width=screen.width*0.7; this.alt='点击在新窗口查看全图\nCTRL+鼠标滚轮放大或缩小';}" border=0>  screen.width*0.7) {this.resized=true; this.width=screen.wid...[ 查看全文 ]

  • 标签:PS PS基础
    我们都知道摄影是光的艺术,在晴朗的太阳天,蓝天白云、唯美的逆光、大量的光斑都会为片子增色不少,有很多发挥的可能性。但天气阴晴圆缺,总有阴雨天的时候,如何在阴天也能拍出温暖治愈系的人像呢,这里花想衣裳跟大家分享一下经验,从前期准备和后期处理两方面展开。 一、前期准备: 阴雨天天空通常是雾蒙蒙的,各类植物没有阳光的照射也显得比较灰暗,没有生机,所以在前期准备时候,要选择色彩丰富...[ 查看全文 ]
  • 孕期安全性爱牢记5大原则 按传统的说法, 孕妇 怀孕 期间是不宜过性生活的,但实际上在女性怀孕期间,很少有夫妻真正停止性生活,如是采取相应的措施,掌握分寸,是不会有问题的。再说,从“妊娠期不用避孕”这种解放感出发,提高了夫妻的性兴奋性,加深了两人的感情。 一般来说,孕妇过性生活对胎儿的影响,主要表现在孕期的前三个月和后三个月。前三个...[ 查看全文 ]
  • 母乳有何益智作用? 母乳中含有宝宝大脑发育不可图老师缺少的不饱和脂肪酸及其他多种营养素,其中的亚麻油酸在牛奶中几乎测不到,而它恰恰是脑细胞所不可缺少的,人体内无法合成,必须由食物供给。所以要想宝宝头脑聪慧,母乳是首选健脑食物。 牛奶中蛋白质的含量尽管是人乳的两倍,但人乳含有婴幼儿脑发育不可缺少的不饱和脂肪酸,特别是亚麻油酸,在牛奶中几乎没有。人脑和牛脑重量的相对比例是50:1...[ 查看全文 ]
  • 标签:PS PS基础
    效果图: 原图: 操作步骤: 一\修饰 1.打开图像,拷贝图层,更改图层名称为修饰. 2.使用液化滤镜命令增大眼睛和改善嘴唇. 二\皮肤光泽 1.新建曲线调整图层. 2.点击颜色范围按钮,进入"色彩范围"选取需要调整下肢皮肤区域. 3.如果太亮了,可以更改图层不透明度. 4.使用白色画工具涂抹出其它需要提亮的皮肤. 5.再次新建曲线调整图层。 6...[ 查看全文 ]
  • 不需要每天都拿着瓶瓶罐罐的护肤品往脸上招呼,只要在发型上稍微做些功夫,你也能轻松美白。发型师示范三款变发的技巧,运用染发、剪发和编发,提升皮肤亮度,让脸蛋看起来更白皙。 第1招 编发 利用简单的三股编发,将垂放在肩膀的头发收起,让光能往上打在脸上,就像是拍照时打光板的效果;另外,颧骨与下巴附近的发丝也要收干净,更能让脸形看来修长且亮白。 Step1 将后脑勺的头...[ 查看全文 ]
  • 标签:PS PS教程
    教程重点介绍一下碎片人像的制作思路。如果是真实人像图片,还需要经过简单的处理,把暗部转为矢量图,然后再上色及添加碎片等。 最终效果 1、打开人物剪影素材,用魔棒工具把人物选取出来,复制到新的图层。 2、新建一个图层,用画笔随手涂些颜色,看个人喜好 ctrl+左键点人物图层,弄出选区,反选去掉不要的。 3、碎屑同上的方法复制出来,然后用套索工具选取局部复制,贴到人物及周边,看上去自...[ 查看全文 ]
  • 标签:PS PS基础
    效果图 原图 1、在photoshop中的打开要处理的原图,将背景复制一个背景 副本图层,如下图所示: 2、去除雀斑一般都是用修复工具,修复工具共有四个,位置如下图所示,我们先选中污点修复画笔工具: 3、单击上方的属性栏,将硬度设置为0%,这样在处理时会有较好的过渡效果,如下图所示: 4、污点修复画笔工具的使用很简单,适当调整大小,在有雀斑的位置轻轻的单击一下即可,细心一点操作...[ 查看全文 ]
  • 标签:化妆
    银色、金黄色连接,打造淑女性感妆容 关键词: 彩妆 这个季节的彩妆将银灰、金黄作为连接所有色彩的主打色,妆面强调色彩,而忽略手法与形式,不华丽、不张扬,只抓住细节重点,让妆容在淡淡的性感味道中散发几许华贵与懒散气息。不管是卷翘浓密的睫毛,银白闪耀的精致眼线,还是极具透明的肤质,都让这个秋天,漂浮出最耐人寻味的女人味。 白天篇 性感妆容 阳光闪耀的金黄衬托出优雅的淑女性...[ 查看全文 ]
  • 偏色照片的修复方法有很多,下面的教程介绍用常用的替换颜色来修复。过程也非常简单,先用替换颜色选择人物偏色的部分,然后设置需要的正常肤色。后期再调整下整体颜色即可。 原图 最终效果 1、打开人物素材,选择菜单:图像 模式 CMYK颜色,然后执行:图像 调整 替换颜色,用吸管将面部区域选中。然后选择替换后的颜色:#bb9e94。参数设置如下图。 2、新建一个图层,按Ctrl ...[ 查看全文 ]
  • 上一页226352263622637226382263922640226412264222643下一页
    手机页面
    收藏网站 回到头部